Share
Pin
Tweet
Send
Share
Send
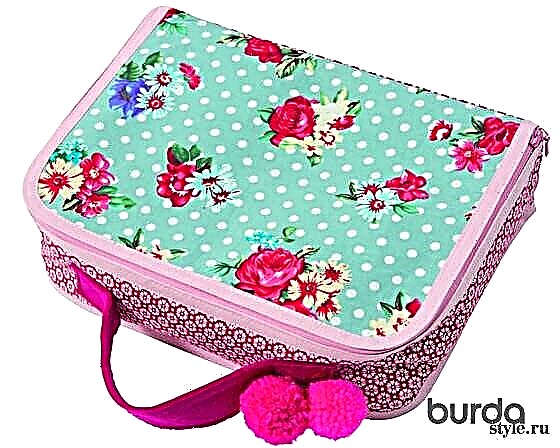
You can easily sew it on our free pattern! Such a suitcase will come in handy both for mommy for storing little things for babies, and for the very child of preschool and primary school age!
YOU WILL NEED
Cotton fabric 110 cm wide: with a large pattern - 0.20 m, with a small pattern - 0.10 m; plain cotton fabric (chambray) for lining 0.20 m wide 140 cm; non-woven Decovil I Light 0.30 m wide 90 cm; a felt flap for a handle measuring 6 x 22 cm; finished slanting cotton bast 2.60 m wide 2 cm; 1 plastic zipper 60 cm long; neon-colored threads for pompons; small device for making pompons (Prym).
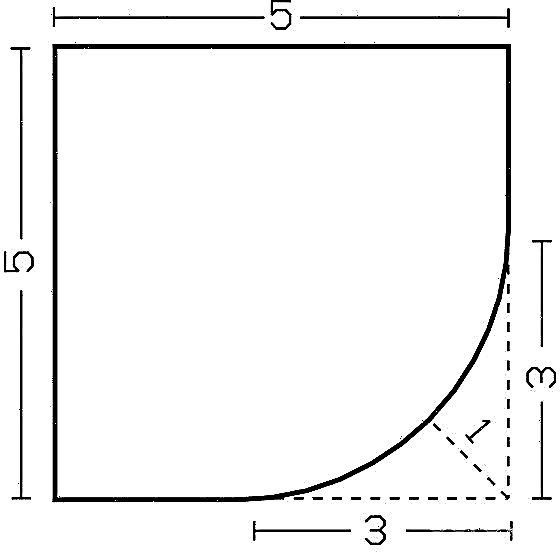
Make a PATTERN according to the measurements given (in cm) in the photo.
CUT TO:
For all parts, allowances are already taken into account in the given sizes.
From a cotton fabric with a large pattern:
The lid and bottom of the suitcase are 25 cm long and 19 cm wide.
Fine cotton fabric:
2 lateral parts: 1x 60.5 cm long and 1x 27 cm long, all 8 cm wide.
Plain cotton fabric (lining):
The lid and bottom of the suitcase are 25 cm long and 19 cm wide;
2 lateral parts: 1x 60.5 cm long and 1x 27 cm long, all 8 cm wide.
From felt:
2 handle parts 22 cm long and 3 cm wide.
Gasket: iron to patterned parts.SEWING:
■ On the lid and the bottom of the suitcase (from the main fabric and lining) round the corners along the front longitudinal cut, for this it is best to prepare a template from cardboard according to the drawing.
■ Sweep the lining parts, respectively, under the cover, the bottom and the long side with the wrong side to the wrong side.
■ Turn both longitudinal sections of the long side part with an oblique rib as follows: fold the rib along so that the bottom part of the inlay is 1 mm wider than the part of the inlay that is on top. Slices of the side part to put into the fold between the parts of the tape and to sweep, the wider part of the tape lies on the wrong side. Take on a tie to the edge.
■ Shorten the side and front sections (with rounded corners) of the lid and the bottom of the suitcase with a slanting hem. Tip: for the rounding sections, press the oblique in the shape of the rounded corners.
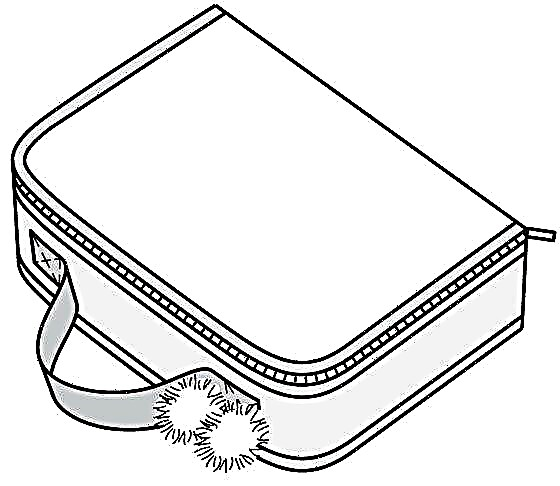
■ Sweep the zipper under the upper edge of the long side part and under the edged edge of the cover. In this case, the teeth begin at a distance of 1 cm from a short cut. Stitch the zipper exactly into the seams of the sewing of the edging trims and close to the cloves. Close the zipper. At the end of the zipper, at a distance of 1 cm from the cut, make a small fastener (3-4 stitches in the forward and reverse direction). Cut off the protruding end of the zipper. Open the zipper again.
■ Fold the handle parts with the wrong sides, grind along the contour to the edge. Pin the ends of the handle to a long side part at a distance of 21 cm from short sections, stitch along the perimeter of the quadrangle and crosswise.
■ Pin the short side part (from the main fabric) to short cuts with the side part length the front side to the front side, the ends of the short side part protrude 1 cm on both sides. Stitch with allowances 1 cm wide. Iron seam allowances on the short side part . Stitch the lid and bottom to the appropriate cuts of the short side part, allowance width 1 cm. Iron seam allowances on the side. Iron sections of the remaining part of the lining on the seamy side, 1 cm wide. Lay the lining on the inside of the short side part with the seamy side facing the seamy side and sweep. Stitch the short side part along the contour close to the seams of the stitching, securing the lining. Fold the edged edges of the bottom and the long side part to the wrong side and sew to the edge.
■ Make 2 pompons from wool yarn. Sew pompons at one end of the handle.
Material prepared by Elena Karpova
Share
Pin
Tweet
Send
Share
Send


